There’s no denying Halloween is different this year. When the realization set in that my boys might not get to trick or treat like we usually do or go to the Halloween attractions we’ve come to love, I was disappointed. I knew I needed to find another way to get them and me into the Halloween spirit. I NEEDED another way to get excited for Halloween. Then it dawned on me! I could decorate my front lawn for Halloween. The more I thought about it the more the ideas for outdoor Halloween decor came to me.
My initial inspiration came from Oriental Trading Company. They were generous enough to send us a dragon skeleton and a spider skeleton. Sea Bags sent us some Halloween buckets that were sturdy enough to do double duty as outdoor Halloween decorations. Olive & Cocoa complemented our decorations with a wonderful Halloween mat. With those pieces as inspiration, I headed to the Dollar Tree store to see what I could find.
What I found at the Dollar Tree store went beyond my expectations. They truly have a little bit of everything eyes, spiders, tombstones, luminaries, skulls, and more. With the pieces from Oriental Trading Company, Sea Bags, Olive & Cocoa, and the treasures I found at Dollar Tree it was easy to DIY outdoor Halloween scenes. Below are 9 DIY ideas for easy outdoor Halloween decor you can do and my tips for creating them. I hope they inspire you and bring cheer to you and your family this Halloween.

DIY Ideas for Easy Outdoor Halloween Decor
When possible, I’ve included links to products to make it easier for you to know where to shop. Our links to Amazon and Oriental Trading Company are affiliate links. As an affiliate for Amazon and Oriental Trading Company we earn a small commission from qualifying purchases. That goes to help support Jersey Family Fun and the moms who work to create helpful content for our readers.
Create a Spider Web
Here’s a look at what I used to create a creepy spider web.
- Giant spider from Oriental Trading Company (this is one they sent me.)
- Chicken wire (any home improvement store.)
- Spray paint (optional)
- Plastic oversized bugs or rodents
- Smaller spiders (get them at the dollar store)
- Mesh roping (available in different colors at the dollar store.)
- Garden stakes (any home improvement store.)
- Dental floss (optional)

The chicken wire will act as your spider web. The heaviness of it allows it to stay put and the wires will allow you to weave items into the web. I first sprayed the chicken wire with spray paint. I wanted to give the wire an element of shimmer, but this is an optional step.
Once the wire was dry I draped it along the front side of my fence. I used additional wiring in the package to hold the ‘web’ in place at columns on my fence. I used garden stakes and additional wiring to pull the bottom corners down and mount them in the ground.

With the web in place I used black mesh roping and weaved it in and out on the wiring along the edges to create a trim. That helps the web stand out more against the fence.
Next, I added the main focal point of my web, the giant spider from Oriental Trading Company. I positioned it so that some legs were in-between holes in the wiring web. I used wiring to attach the spider to the web. I attached it at its main body and around the edge of a few legs. A few wraps of wiring between the body and the webbing was all that was needed to hold it in place.

With the spider securely attached, I was able to have a little fun with this. I took plastic rodents and bugs I had from over the years and tucked them into the webs at various point. If you have dental floss, wrap it around the rodent/bug to give the impression the spider has it wrapped in its web. For my web, I put a large fly in the spider’s mouth.
For an extra bit of shimmer and detail I added small glittery spiders into the web.
Design a Haunted Sea
Want an element of pirates and mermaids for your outdoor Halloween decor? Design a Haunted Sea. Here’s a few items that will help.
- Octopus skeletons

- Treasure chest (party stores or craft stores)
- Beads, shells, jewels, etc.
- 2-5 Cinder blocks (home improvement stores, typically less than $1.50 each)
- Wiring, garden stakes
- Blue plastic tablecloths
- Sand or dirt
If you want a mermaid skeleton, don’t wait. Order it soon. I had this whole vision of creating a haunted scene for my outdoor Halloween decor but then the mermaid I wanted was out of stock. Here’s what I was thinking that could work for you.
Using your cinder blocks arrange them to look like a pile of rocks. Position your mermaid skeleton as if she was washed up or sitting on the rocks. Secure your mermaid in place with wiring wrapped around the spine and either the rocks or garden stakes. Prop up the tail in such a way that your neighbors and others can see it from the road. Don’t just let it rest in the grass.
Not too far away position your treasure chest. Place some rocks under one side to have it angled toward the road. Leave the treasure chest open. Position your octopus skeleton with some of the tentacles on the treasure chest and some on the ground.
Fill your chest with dirt or sand to hold it in place. Drape shells, beads, and other treasures over the sides of the treasure chest. Extra beads can be draped across the octopus.
Attach any skeleton fish you bought to garden stakes and position them swimming between the mermaid and treasure chest.
For an extra touch you can drape blue plastic tablecloths over the ground to give the impression of water. You can dress your mermaid up with a wig and a shell top. Scraps of fabric can hang off the mermaid’s lower body to represent her old fin.
Build a Dragon’s Lair
As soon as my dragon skeleton arrived, compliments of Oriental Trading Company, I knew I wanted to create a dragon’s lair as part of my outdoor Halloween decor. Thinking about it and doing it were two completely different things. After some trial and error, I figured out an easy way to build a dragon’s lair for Halloween. Here’s what I used.
- Dragon skeleton from Oriental Trading
- 3-6 Cinder blocks
- Halloween plastic gating (Optional)
- Orange plastic tablecloths
- Wood or metal stakes
- Wiring
The hardest part of creating this scene was positioning the dragon. I wanted to position him elevated off the ground so my neighbors could appreciate all his details. I used a few wooden stakes tied together and positioned under the dragon’s chest to hold up the top part of the dragon skeleton’s body. I wrapped wire between the ribs and back and forth around the dragon’s spine and the wooden stakes. I positioned one thinner garden stake under the dragon’s tail. I wanted the tail pointed upwards. I used the wiring to wrap around the notches of the dragon’s tail and the garden stake.

With the dragon skeleton in place, I started to create the lair. I used cinder blocks on their sides, with the holes pointing up, to create a half circle. I created the fire with orange plastic tablecloths tucked in and sticking out of the holes on the cinder blocks. You can add a decorative element by using plastic Halloween gates available at most stores that sell outdoor Halloween decor.
To hide the garden stakes and give the idea of more fire you can wrap the stakes in orange plastic tablecloths. Tie them tight enough to stay in place but also allow them have movement. A little breeze can make it look like your fire is really blazing.
I gave our dragon’s lair a bit more depth and height by reusing styrofoam cartons. I spray-painted them orange and stacked them on top of each other with the garden stake running through them.

You can add extra touches to your dragon’s lair by having skeleton hands or skulls resting in the lava pit or coming out of the cinder blocks.
Host a spooky dog park
I admit when I first started seeing dog skeletons it freaked me out a bit. But then, I put my creativity to work. Why not create a dog park with dog skeletons. Here’s a few things to use.
- Dog skeletons
- Dog bowls
- Dog leashes or string
- Old tires
- Balls
- Garden stakes, wiring
- Tires, dog toys
A spooky dog park can be as elaborate or as simple as you want. Position your dog skeletons first in your designated spot for outdoor Halloween decor. You can have dogs playing together or separate them in different spots with different activities. Secure them into the ground with wiring and garden stakes.
Have one dog playing with a big ball. Or hang balls or other dog toys from a tree with the dogs positioned underneath trying to get at it.
Another dog skeleton could be holding a bone in his mouth or look like he’s digging up dirt to bury a bone.
Dogs could be drinking from dog bowls. If you have tires or other props create a dog obstacle course and pretend like your dog skeletons are trying to get through it.
Create a spot to hang the dog leashes or wrap them around the dog’s necks and let them just hang. Better yet, you could position a human skeleton or ghost to be holding the other end of the leash.
Decorate the Front Door
You can’t talk about outdoor Halloween decor without talking about the front door! I feel like this is one of the easiest places to decorate for Halloween.
- Hauntingly fun doormat
- Halloween wreath
- Dollar store Halloween decor
- If you have columns or posts
- Plastic table clothes
- Small Halloween decorations
- If you have windows on your door or a glass storm door
- Poster paint
- Hand dishwashing soap
- Window markers (optional)
While most of our outside Halloween decorations are on the scary side, for the front door, we tamed it down. We went for fun and playful Halloween. I started with the glass storm door. If you have window markers let the kids create a Halloween scene on the glass. If not, have them paint the door. I actually prefer painting the glass. The colors tend to be brighter and more vivid. If you mix each color with a little hand dishwashing soap it’s easy to wash away the design when Halloween is over.
If you don’t have a glass storm door or door with windows, consider a beautiful Halloween wreath to make your front door special. Every front door deserves to be complimented with a great Halloween doormat. Olive & Cocoa sent us this Witch’s Legs Door Mat to dress up our front step. I’d say it’s perfect. Get yours or shop for other Halloween mats at their site.

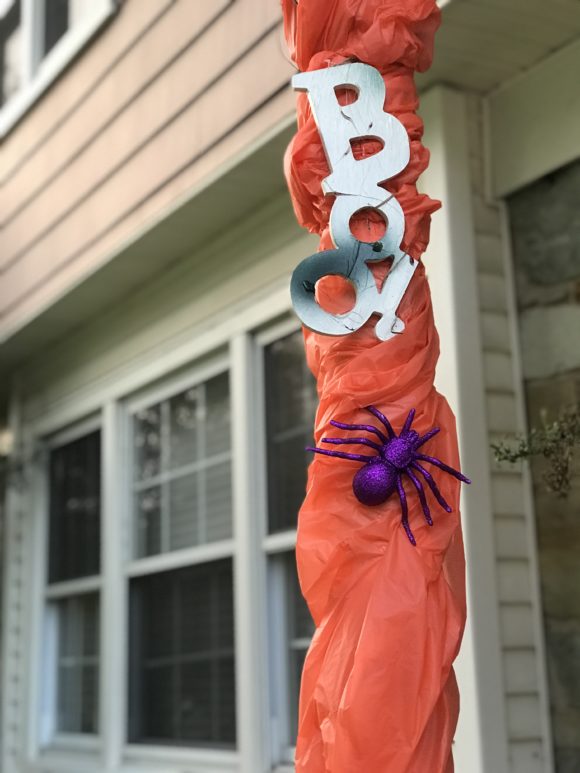
I extended our outdoor Halloween decor to the one column we had on our front porch. I wrapped it in one of those orange dollar store tablecloths and twine. Then, I attached metallic spiders, a boo sign (that I painted), also from the dollar store, to the column.
Sarah from Sadie Seasongoods also shared this idea, “This is a super simple DIY project that is meant to go on a front porch or sidewalk (weather-permitting) to encourage low-contact trick-or-treating for a safe Halloween! Get the directions here.

Pick Inflatables for Your Outdoor Halloween Decor
Inflatables are the easiest way to decorate your front yard for Halloween. You can find them online at Amazon or any store selling Halloween decor. Prices tend to run from $30 to $200. You can purchase one Halloween inflatable as a focal point for your yard or create a whole scene of them.
Here are a few of our favorites Halloween inflatables from Amazon.
More ideas of Outdoor Halloween Decor
Spooky Bushes
I had a lot of fun decorating our front yard bushes as part of our outdoor Halloween decor. I discovered plastic eye and ornament balls that looked like eyes at the dollar store. I picked up a few varieties and securely attached them inside various bushes around the front of my house. It’s a quick project that cost a dollar or less for each bush and took less than 10 minutes to do.


Creepy Plants
Complement your spooky bushes with some creepy plants. Sea Bags sent me these adorable Halloween buckets. I carefully positioned one underneath a plant on our front porch to give the impression of a Frankenstein with overgrown hair. It’s a perfect spooky Halloween design element without being too scary. Plus since they are made of recycled sail cloth I know they will be durable and able to withstand wind or rain. Sea Bags has helped keep over 700 tons of sail cloth material out of landfills through its recycling and upcycling methods!

I tucked the ghost bucket in between our bushes to give the impression of a ghost floating among the landscape. Visit the Sea Bags website to get your Halloween bucket.

Haunted Trees
The local dollar store is a treasure trove of outdoor Halloween decorations and your trees are the perfect place for them.
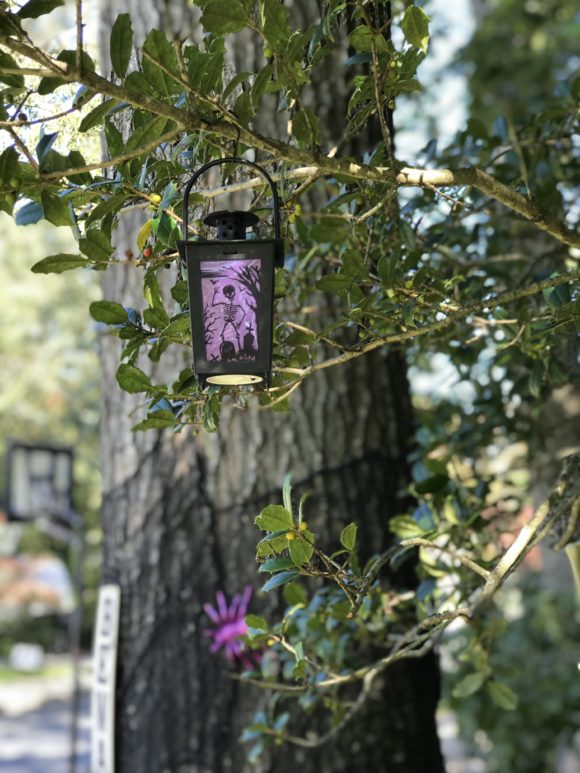
Wrap the trees in black fabric wraps to give them a spooky feel and to provide contrast to what you might add.

Signs, bats, spiders, can all be easily stapled onto a tree without causing any permanent damage to a tree. I used double-sided tape to attach plastic eyeballs.

I have glow-in-the-dark skeletons and luminaries hanging from the trees. I also filled these glass pumpkins with bird seed before hanging them up on branches. The birds are loving them.

Don’t forget the windows
Another easy idea for Halloween decor is to decorate your windows. Most dollar stores sell plastic window scenes or window clings. You could also tape plastic caution tape back and forth across windows.
